

The LPi bulletin widget uses JavaScript to predict the URL for the bulletins and bulletin images uploaded on the LPi website. The javascript takes in a 4-digit parish code and generates a list of the most recent bulletins on the website. The bulletin widget can also load more bulletins with an optional button. The initial amount of bulletins can be adjusted along with the amount loaded per click. You can also set a limit on how many bulletins can be loaded.
This only works with Parishes that use LPI for their bulletin publisher
Setup Instructions
The setup for the bulletin widget is similar to that of an Elfsight widget or any other script tag. The style classes either need to be put in the module, or particle, or they can be injected directly into the article using an additional div tag with the classes.
Currently, only one bulletin widget can be used per page
The code calls the function with this:
bulletinPage("0861", 17, 7, 5, "02", false);
The code then replaces this HTML with the widget:
<div id="bulletin-html"> </div>
The function has 5 parameters/variables:
these must be changed in the correct order, if you want to keep the default value you can add 'undefined' in that space
bulletinPage("Lpi Parish Code", Max # of bulletins, initial # of bulletins, bulletins loaded per click, "Lpi folder code", open in a new tab?);
How to find the Lpi Parish & Folder Code
You will need to find the Parish and Folder codes from Lpi. You can find those numbers by following this link and searching for the parish:

Open up the parish you are looking for and click the view bulletin button
On the next page take a look at the url and find the 4 digit number associated with the parish.
The folder Code can be found in the same URL:
Insert the parish & folder code into the function, you must include the quotation marks:
bulletinPage("0861", 17, 7, 5, "02");
How to add the Bulletin Widget to an Article
1. Obtain the parish and folder code from LPI
2. update the parish & folder:
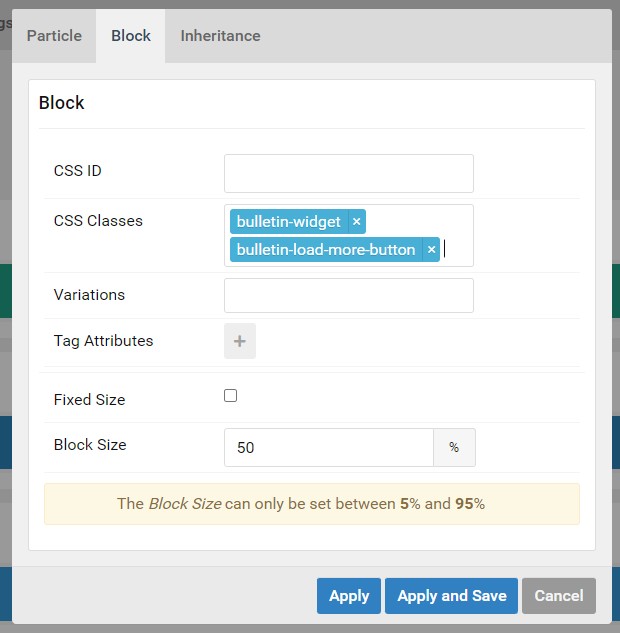
<div class="bulletin-widget bulletin-load-more-button">
<div id="bulletin-html"> </div>
</div>
<script>
bulletinPage("XXXX", 17, 7, 5, "02");
</script>
3. Add or change any of the style tags in the div tag:
<div class="bulletin-widget bulletin-load-more-button">
<div id="bulletin-html"> </div>
</div>
<script>
bulletinPage("XXXX", 17, 7, 5, "02");
</script>
4. Paste into the article where you want it to appear (toggle the HTML editor for this)
5. Use the inspector to adjust the CSS variables for the widget if needed
How to add the bulletin widget to a Module or Particle
1. Obtain the parish and folder code from LPI
2. Create a custom module or custom HTML particle
3. Update the parish & folder code:
<div id="bulletin-html"> </div>
<script>
bulletinPage("XXXX", 17, 7, 5, "02");
</script>
4. Paste the code in the module or custom particle
The CDATA that gets added to the module will not break it
5. Add the style classes into the module class suffix section
make sure to add a space in front of the first class
6. Place the module in a module position or call the module in an article using the [modulee-1234] brackets.
make sure to update the 1234 to the actual module ID
If you assign the module to a position you will also need to assign it to only the menu item you want it to appear on
7. You can also add this via a custom HTML particle. Just add the classes in the block settings instead
8. Adjust the CSS variables in the override.css file if needed.
Examples
Subpages
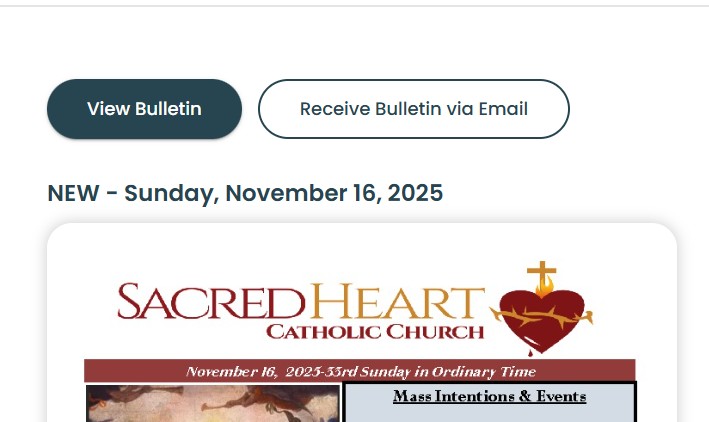
Bulletin Widget Default
<div id="bulletin-html"> </div>
<script>
bulletinPage("0861", 17, 7, 5, "02");
</script>
bulletin-widget bulletin-load-more-button
Homepages
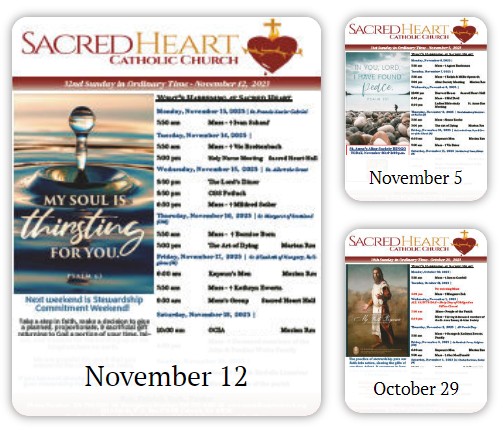
Bulletin 3 Pack
<div id="bulletin-html"> </div>
<script>
bulletinPage("0861", 17, 3, 5, "02");
</script>
bulletin-widget bulletin-3-pack
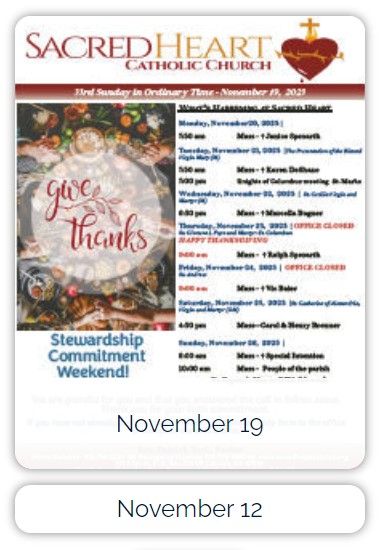
Bulletin Picture With List
<div id="bulletin-html"> </div>
<script>
bulletinPage("0861", 17, 2, 5, "02");
</script>
bulletin-picture-list
Adjusting the Variables
You can adjust the look of the widget with variables. Add them like this and mark them as important:
  .site-1-home .bulletin-variables {
    --bulletin-border-radius: 1rem !important;
  }
Not all variables are used for each different style
Here are the available variables to change:
    --bulletin-border-radius: 1rem;
    --load-more-border-radius: var(--bulletin-border-radius);
    --big-bulletin-font-size: clamp(1.2rem, 1.5vw, 2rem);
    --small-bulletin-font-size: clamp(1.2rem, 1.5vw, 2rem);
    --bulletin-container-padding: 10%;
    --big-bulletin-size: 90%;
    --bulletin-title-color: var(--default-black);
    --bulletin-text-background-color: rgba(255, 255, 255, 0.95);
    --bulletin-list-background-color: var(--default-white);
    --bulletin-gaps: 1rem;
    --bulletin-list-row-height: 3rem;
    --bulletin-text-hover-color: var(--default-black);
    --bulletin-margins: var(--bulletin-gaps);

    /* set this to 'initial' to make the load more button show up */
    --load-more-button-display: none;

    /* adjust this to change how small they can get */
    --bulletin-min-width: 125px;

    /* adjust this to change how big the bulletins can get */
    --bulletin-max-width: 350px;

    /* adjust this to make the bulletins smaller */
    --small-bulletin-min-width: 130px;

    /* change this to adjust the # of bulletin columns relative to the bulletin size */
    --bulletin-container-max-width: 899px;